First 5 min are awesome.
The rest is just simple fun.
Just "Stop being bottom!"
January 15, 2014

December 29, 2013
DIY Floor Light

So I started with a $10 eBay umbrella adapter I already had and went to IKEA to pick the rest components. Click the image on the left for more step-by-step pictures.
I settled for a Rodd table lamp base (a cheaper and shorter version would be better but I never realized it existed!) and an Ollsta shade (you decide which size - I picked a larger one.) I liked how the wire is routed in the Rodd base - it goes out to the side and the switch is at the very top. Thus removing the base and replacing it (somehow) with an umbrella adapter should not interfere with wiring. BTW this shade can be installed with wider opening down OR up. I though it was a nice touch.
So the first step is to remove the cold shoe from the umbrella adapter. This exposed a nice hole. I then went back to Rodd lamp base. The base itself has a tube adapter which I removed. Now I had to figure out how to attach this lamp tube adapter to the umbrella adapter. An M6 bolt which I already had looked like something which can do the trick. A visit to a big box store brought me Irwin Metric Tap and Die Set. I tapped an M6 thread in the umbrella adapter. I cut of half of the lamp tube adapter and I drilled a hole and tapped the same M6 thread there. Then I cut off an M6 bolt head and screwed it both into the umbrella and lamp tube adapters.
And that was it!
October 2, 2013
Monitor Calibration
I bet you've heard this before: "Thou Shalt Calibrate Your Monitor". So how often did you act on this? Aha!
I was always confused not only by the complexity of the procedure but also by the fact that it can be done on so many layers - you can adjust your monitor knobs, your graphics card driver has calibration controls, e.g. gamma, Windows (and I suspect others) offers some procedures, and, finally, there are dedicated hardware/software packages designed to do just that.
So today I am doing all of the above!
I was always confused not only by the complexity of the procedure but also by the fact that it can be done on so many layers - you can adjust your monitor knobs, your graphics card driver has calibration controls, e.g. gamma, Windows (and I suspect others) offers some procedures, and, finally, there are dedicated hardware/software packages designed to do just that.
So today I am doing all of the above!
September 22, 2013
TheaterYou production of Aktrisa
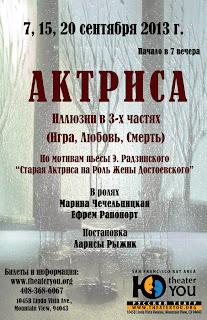
Technically it was a challenge. Low light, multiple cameras (Nikon D600 and Canon HF S200) which required matching color and sensitivity.
What worked:
- Limiting video AGC on Canon HFS200 to 10db, sometimes even to 6 or 3db. Zebra pattern helps a lot! I wish Nikon D600 had it.
- Nikkor 24-85 proved to be a good video lens! AF was almost silent. Used it at 35mm, F5.6 for wide shots.
- Sonya did a good job operating D600 - I used a lot of her slow pans instead of my close shots - I do have a tendency to rush - need to slow it down.
- Sony Vegas 12 Pro multi-track editing proved to be very efficient. Loved it!
- Sony Vegas 12 Pro color-matching plugin is awesome!
- Connecting recorder to video camera offered no tangible benefits. I set the camera audio level manually. That of the recorder was on auto. I still used sound file from the recorder. Video camera track was adequate.
- Setting DSLR and camcorder sensitivity to the same level was tough. I had D600 ISO on 1600 to avoid high noise. It proved to be too much although histogram of a shot I took seemed to be adequate. I wish zebra was there on Nikon.
- DSLR was set on constant AF with face recognition. Worked OK although on few occasions focus was on a wrong person. Call it operator error.
- My efforts to set custom white balance on both HF S200 and D600 failed. the Scene light had so many colors the balance on D600 and HFS200 never matched. Next time I will just set it to one Kelvin value.
- Overall I am not happy with D600 footage. To prepare I read these reviews and was concerned about noise and moire. Yet the resulting footage lacks...dynamic range. I see blobs of colors with not enough details (when compared to HF S200!) in either highlights or shadows. This makes no sense. At all. Oh and I forgot to reset picture style to totally neutral - I think I had it on Standard, but the effect could not be that bad!
September 20, 2013
This Year Photowalk..
... it is ON! Can't wait to see old friends and meet new ones!
http://worldwidephotowalk.com/walk/campbell-ca-united-states-campbell-downtown/
http://worldwidephotowalk.com/walk/campbell-ca-united-states-campbell-downtown/
September 10, 2013
Blackmagic Design DeckLink Mini Recorder - PCIe Capture Card for 3G-SDI and HDMI
Originally submitted at Adorama

Blackmagic Design DeckLink Mini Recorder - PCIe Capture Card for 3G-SDI and HDMI
Good bang for the buck
By AVS from Campbell, CA on 9/10/2013
Pros: Smooth Instalation, Video Quality, Price
Cons: Not Plug-n-play For Hdmi
Primary use: Business
Computer Platform: PC
Installation went smoothly with no hickups. I use it with HDMI for live HD streaming with UStream Producer. You really need to understandthe format of the signal coming in and set it manually in the software preferences. Oh and it defaults to SDI! There is no plug-and-play in this respect. E.g. my DSLR outputs 1080i and I need to set it in preferences to see the picture. If I change DSLR to 720p, corresponding change has to be made as well.
I intend to investigate its use for recording.
I intend to investigate its use for recording.
(legalese)
September 9, 2013
Photobooth. Where Do I Start?

- DSLR shoots tethered into laptop running Lightroom. My thinking it will be triggered remotely. Not sure the standard Nikon IR trigger will work in the sun.
- A wired SB800 plays role of a CLS master triggering flashes mounted in the shelter. Looks like two flashes firing in the upper front will be enough to create nice light. Two more flashes will be firing into the back wall to create a high key background. I am now thinking about mounting CLS master into a beauty dish for a better catchlight.
- Lightroom applies development preset upon import. I intend to offer customers live view on a big monitor
- Given a non-profit nature of the event, I intend to charge for printing only. Post event online delivery will be free.
Oh! And here are the articles I read about the photobooth:
- Mark Wallace is consistently good on topics I am interested in - should keep an eye on this guy.
- Rob Lim. How To Create A Simple Photo Booth.
Also need props:
- paper moustache,
- tiara, crown, hat
- boa
- oversized glasses
- boxer gloves
- shelter,including canvas roof and walls
- 4 slave flashes, 1 master
- extra batteries
- battery chargers
- umbrella adapters
- 1 stand for master flash
- TTL cord
- camera
- tripod
- AC adapter for camera
- usb cable
- laptop
- laptop power supply
- laptop mouse
- laptop hood
- 24" monitor
- monitor hood
- 1 stand for monitor
- clamps to hold monitor
- HDMI cable
- printer
- usb cable
- photo paper
- extra ink
- gaffer tape
- table
- UPS
- generator
- props
- business cards
- knife, scissors
Subscribe to:
Posts (Atom)