February 27, 2011

DIY: PVC Light Stand

Recently I decided to build few light stands for all these flashes and workshop lights lying around. There are more than few examples of PVC light stands on the Internet.  I wanted however for only 3 points to touch the ground (thinking this will be most stable for a given amount of materials used) so decided to go with a C-stand design  made of 3/4" schedule 40 PVC pipes and joints.
I am pleased with the result.  As one might have expected the stand is not rigid (because of the flexibility of the PVC pipe) yet surprisingly stable.  Besides, because of the different height of the legs one can put two such stands very close to each other - try that with alternative designs!

February 24, 2011

Chinese New Year Parade in the City

I do not think I cracked this nut.  Combination of poor weather, limited access (or rather my lack of mobility - no excuse for that) and poor choice of the lens made this a fiasco.  I wanted to try the new 24mm prime so much I used it with too shallow death of focus.  By the end D90 had trouble auto focusing in such low light conditions.  Hand holding a CLS-driven SB600 worked though as expected.

What might have worked:
  • use tele lens for shots like this.
  • 16mm lens from inside the parade
  • setting an area with soft light behind a big diffuser panel or just finding a location where flashes could be bounced off.
Oh well, you live you learn.

DIY: Wearable Flash Rig and Diffusion Panels

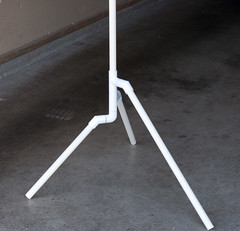
I just realized that I never properly documented any of my DIY projects - wearable flash rig, diffusion panel or light stand.  Consider this in place of a "proper" documentation.

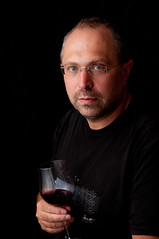
I use a wearable flash rig to take photos in a bright sun and I built it specifically for Burning Man 2010.  It proved to be an awesome solution for fill flash in a bright desert sun.  Just put your subjects with their back to the sun,  "say I'm soooo cute" and press the shutter.  Majority of these photos were taken with this rig - Nikon D90 on-camera flash driving via CLS 2xSB600 flashes being controlled by TTL.  Manual control is also an option.   The rig is made of 1/2" schedule 40 PVC pipes and joints.  It is a great conversation starter but be careful if you decide to wear it in the club - please be gentle to your neighbors in crowded places.

After this post was published I found an even more grandiose approach to a moveable lighting rig: Human Light Suit.  Designed for exactly the same purpose, Eric Schwabel's rig can overpower the Burning Man sun!  And the catch-light is nothing short of amazing!

January 6, 2011

Headshots that Really Rule

The Best Portraits from TIME 2010 feature work of Marco Grob (7), Peter Hapak (2), Nadav Kander(1), Peter Yang (1), Robyn Twomey (1), Platon (1), Jodi Bieber (1), Dan Winters (1), Kate Peters (1). Of these portraits only those by Peter Hapak were shot in high key.
What's in:
  • low key
  • use of a relatively wide angle lens
  • "spot" light, on-axis or slightly off, with soft boundaries
  • extra sharp not sharp enough
Strobist on the subject:  Idea: SB-III Barn Door Mod.
Looks like a nice subject for a study here....

October 5, 2010

Rules of Headshots that Rule

My son's headshots are perfect.  No matter the light, pose, his mood or what he had for lunch.  He is two.  It's all downhill from here.

Lighting

  • Use narrow light open loop pattern
  • Most people (all?) benefit from soft light - use sources of large visible size, e.g. diffusion panel.  Softbox offers a good control over light spill.  Shoot-through umbrella is highly portable and is fast to setup.

Posing

  • Square shoulders are a no-no.
  • Be aware of feminine and masculine neck bent.  Then make a conscious decision on which to use.
  • No white above or below iris.
  • In a two-thirds side view only one ear should be visible.

Some Sources

The Zeltsman Approach to Traditional Classic Portraiture
Jessica Pettyjohn's Headshots101

.

September 30, 2010

Diffusion Panels

They are awesome!  They rule the kingdom of DIY Light Modifiers through their old servant Bang for the Buck.  Which still goes strong in my domain.
They can soften the sun or bare flash.  They can be used as a reflection panel for something like this or just put on the ground for this nice cookie-cutter solution (fast forward to about 50% for behind the scene details).  It works so well, after trying one I built another.  Both are a little more than 4'x7' and are made of 3/4" schedule 40 PVC pipe and rip-stop nylon.  Here is the necessary attribution to Dean Collins' tinker tubes with some BTS videos of this great guy.  Building process is well documented.
Look at this one flash head-shot - compare results of use of a 43" diffusion umbrella to that of a 4'x7' diffusion panel.  The light diffused by a large panel is soft and enveloping.
The (only) bad news is that a more powerful light source (or sources!) are desired.  Need to check my Amazon rewards balance!
What works:
  • Large (4'x7') diffusion panel made from PVC pipes and rip-stop nylon offers good quality (both diffused and reflected) light for about $25 in materials.  It is still relatively portable - can be packed in seconds into a 4'x8" cylinder.
  • Ball bungee cords work great to keep the disassembled frame pieces together.  They can also be used to attach one such frame to another.
What does not work:
  • I am starting to run into limitations of 2x SB-600 flashes.  For a high key setup I need at least 3, better 4.   But this has (almost) nothing to do with the subject.

September 9, 2010

Burning Man 2010

Jump right to the photos: Tentura Camp, Reverbia Camp, Center Camp, Playa & Esplanade.
It all started with a loss.  20 min before the departure, while messing with my lesser body (Rebel XT) I dropped it on the floor lens down.  As a result the Sigma 30mm lens could no longer focus on objects closer than about 100 feet.  Bummer!  And this was no more than 3 feet over a cork floor!  This is my first equipment loss due to breakage. So I had to substitute Sigma for Canon 28-105.  The good news is I am not tempted to replace the XT lens as I have only one left!
I also brought D90 with Tokina 11-16 2.8 and Nikon 85mm 1.8 as well as flashes (2x SB600), stands, umbrellas and a tripod.  Both bodies were treated to a gaffer tape wrap to provide at least some protection against dust.  Boy, was it needed!
What worked:
  • Gaffer taping the camera body.  
  • I wore Lowepro off trail beltpack to protect camera - love their slip-lock system.  I used D90 only in the clear weather, Rebel XT at all other times. 
  • Again confirmed that CLS with off-camera flash (two of them actually) offers a great fill in the sun.  Harsh unmodified light from flashes combined with harsh sun at the subject's back opens up shadows and is barely noticeable. And with sun in the back there is no squinting.
  • My flash rig!  It was a hit!  Pictures to come.
  • I am a big fan of wide angle glass.  Tokina worked wonderfully.  Love its constant aperture when zooming.  Most pictures taken at zoom extremes - either 11 or 16 - more of 16.
  • Sensor and lens cleaning with Rocket blaster followed by wet sensor cleaning with swabs with Eclipse. XT sensor and lens are now cleaner than before the trip.  D90 did not even need wet cleaning!
  • Use a small hand-held flash light as auto-focus assist light on steroids.
  • Shemagh rules the desert!  I wore it damp around my neck for cooling in the clear weather.  In a dust storm it offers the best protection.  I can now put it on with my eyes closed.
  • Mountain View Surplus as a source of gear - from goggles to MOLLE vests.  I look forward to PALS-based customizable photo vest.
What did not work:
  • A friend who tried to protect his 50D with rainsleeve had it torn in one day.
  • Twist on/off on mini maglite (I use it as a auto-focus assist light) proved to be hard to execute with one hand and is unreliable.